This page was built to describe TrueNAS CE Goldeye 25.10.4
¶  Installation
https://youtu.be/cA8fZ-lfgaA?feature=shared
¶  YouTube Basic Walkthrough
See the playlist here: https://youtube.com/playlist?list=PL6zQmF2gDqDT7SHyBe7ni1P2S4NzyJpD6
¶ Storage
https://youtu.be/YgTFRrwJnwY?feature=shared
¶ Renaming a Pool
This is strongly recommended if you have a pool name with spaces or capitalization in it
If you have any apps or shares accessing the pool, stop them before starting these steps
-
Navigate to Storage → Pool
-
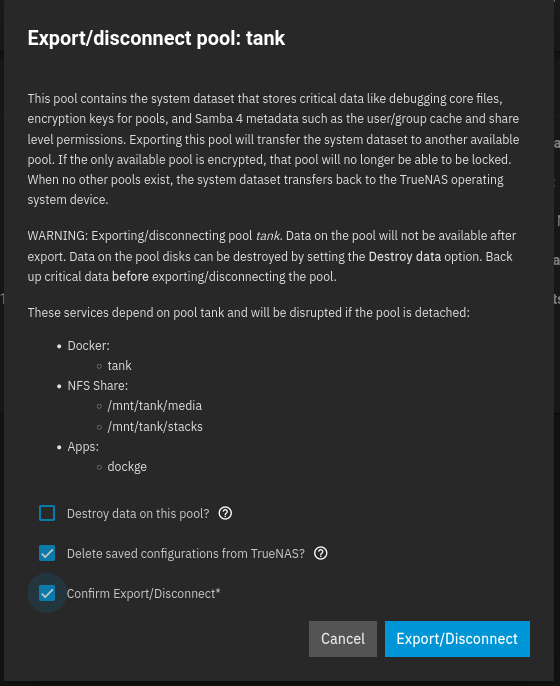
Click on the Export/Disconnect button to export the pool without destroying any of the data:
-
Next, in the shell, run these commands as root replacing the original name of the pool with the new name you have chosen.:
zpool import original_name new_name -
to confirm the new name is working:
zpool status new_name -
so we can import it in the GUI again:
zpool export new_name -
Lastly, navigate to the Storage → Pool tab and click the button for Import Pool in the top right corner. Select the new pool you have just renamed.
If you had any apps using hostpath for the old pool they will have to be edited/recreated. Same goes for rsync tasks, shares, snapshots, etc.
¶ Adding a Single Disk
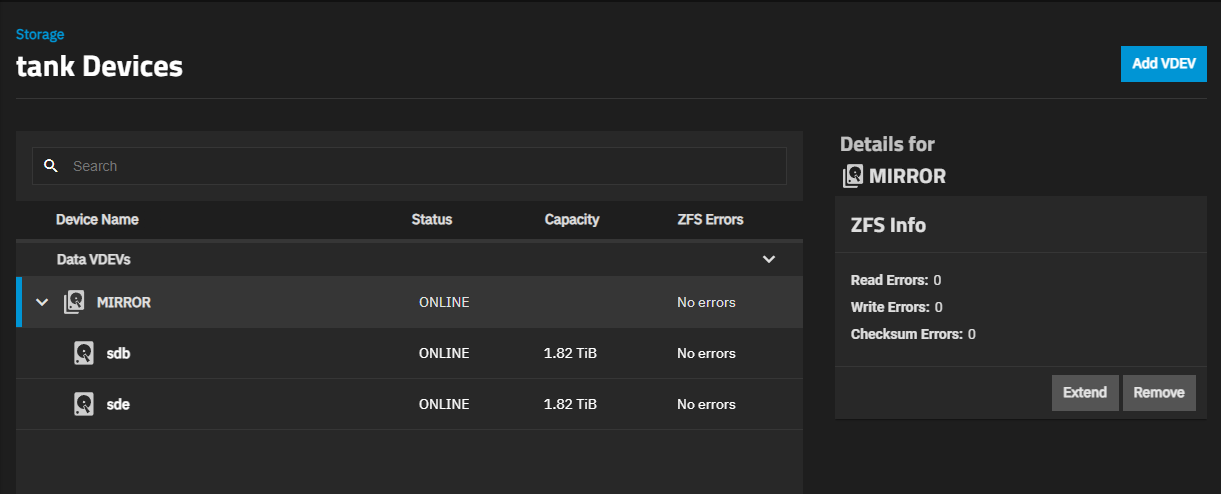
To add a single disk to an existing RAIDZ(1,2,3) pool, use the Extend button in the devices menu.
Note that you will not be able to gain 100% of the usable space from that disk until you run the rebalancing script. You can calculate how much capacity you will gain by using the calculator.
To view progress of the expansion, run this command in the shell:
zpool status pool_name
Watch Lawrence do it:
https://youtu.be/uPCrDmjWV_I
¶ Datsets
https://youtu.be/27MhvLKBKtQ?feature=shared
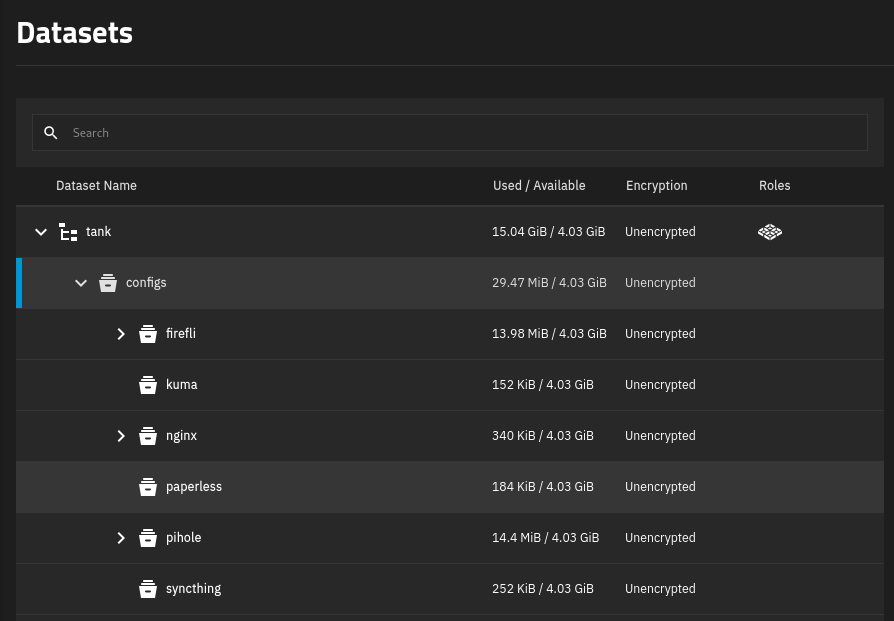
For snapshots and rollbacks at a granular level, datasets should be set up in the pool for each individual app.
¶ Host Path Config Storage
Apps running on Scale should use the Host Path Config option to store their data. You will find this option in the right hand menu under Storage Configuration > Type. This allows for the rapid redeployment of apps with no loss to their configurations, which can be considerable for some. Each app uses its respective host path from the example above. For a video explanation and example of this:
https://youtu.be/JZ9zbcyLcDo
¶ Permissions
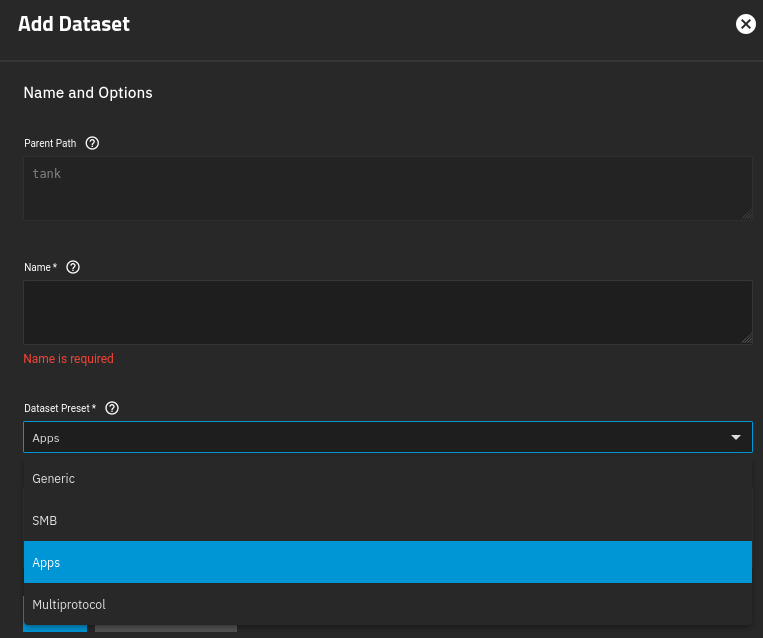
In order for the apps to write to the dataset properly, make sure to select the ‘Apps’ option for the dataset preset:
Once the dataset has been created, you can still modify its permissions like below:
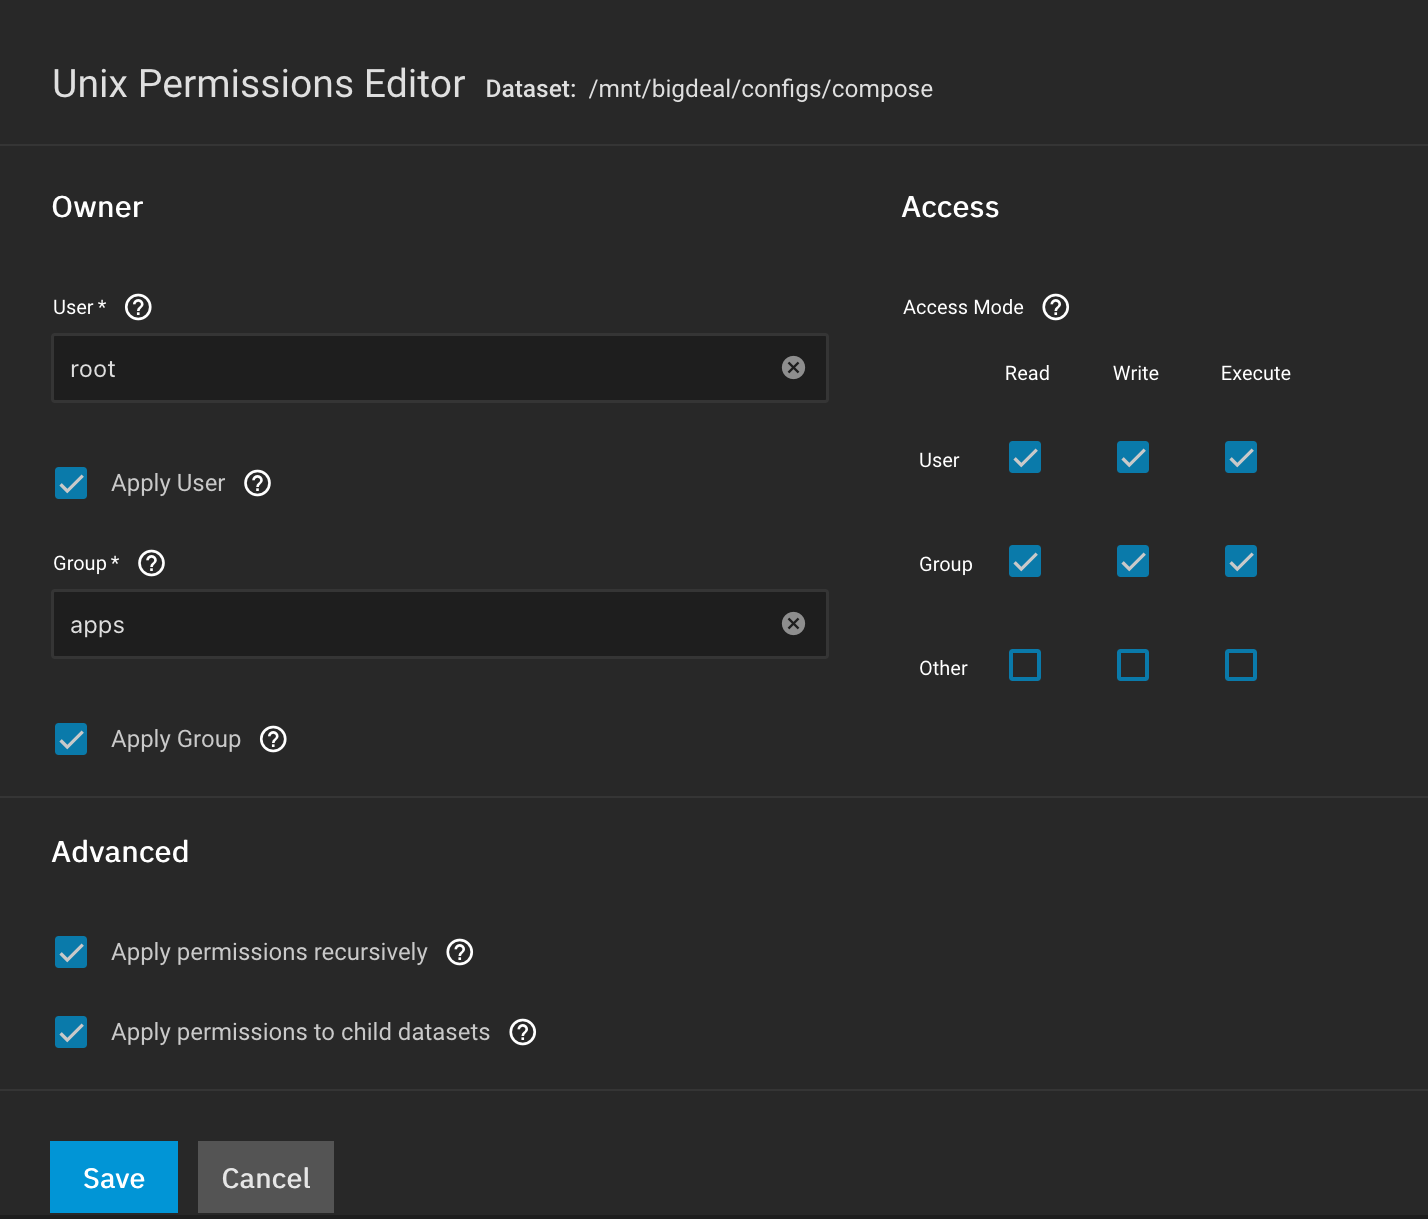
For a video walkthrough on permissions:
https://youtu.be/qAGN0_73cV4
¶ Data Protection
¶ Network
https://www.youtube.com/watch?v=0lzFHySymsU
¶ Adding a Static IP
Having a static IP to your server will prove necessary if you refer to your apps as IP:Port as shown in most of this wiki. If the IP of the server were to change, all of your apps would become unreachable.
- Navigate to Network > Interfaces
- Click the Pencil icon next to your ethernet adapter
- Uncheck the box for DHCP
- Click Add for the Aliases. Enter your IP address, then select /24.
Make sure the IP address you select is available
As long as you are accessing the WebGUI from the address you just selected, you should be given a prompt to Save Changes.
If you are coming from a different IP address, you will need to log back in within 60 seconds to the WebGUI at the new address you just chose, navigate to the Network page, then Save Changes.
¶ DNS Servers
We need to change the Nameservers away from our local to something more reliable.
- Navigate to Network > Global Configuration
- Click Settings
- Change Nameserver 1 to
1.1.1.1and Nameserver 2 to9.9.9.9.
¶ Building a Bridge
Before we setup the VM, we have to build a network bridge. This is necessary because without it, our VM won't be able to see anything on our TrueNAS host. Follow the docs or even better, follow this YouTube video:
https://youtu.be/XBcAMd_wyI0
¶ Apps
Check out the new TrueNAS Apps directory and guide!
¶ Per-App IP Addresses
- Go to your router page and find an open IP in your subnet
- Navigate to the Network Tab and edit the interface your server is running on
- Add the open IP address as an additional Alias
- Navigate to the app you want to assign the IP address to
- Click Edit and scroll to the Network Configuration section, then the Host IPs subsection, then click Add
- Select the new IP address and click Save at the bottom
Note that the WebUI button will not open the correct IP when you click it; you must navigate to the app manually
¶ Migrating Apps to Another Pool
Always make sure you are using host path configuration for your volumes and take a backup of compose files first (if you are using them)!
¶ General Settings
¶ Managing Your Configuration File
You should be taking regular backups of your Configuration File. Especially when upgrading versions, which you will be prompted to do before you start the upgrade.
To take a backup, click Manage Configuration → Download File. In the event you ever need to restore from that file, click Upload File.
When uploading a config file it will overwrite your current settings with the saved ones from the file!
¶ GUI
Some apps like Nginx Proxy Manager require ports 80 and 443. By default, TrueNAS uses these for the webGUI. Change them by clicking the Settings button to any other open port.
After you save the changes you will lose connection to the UI and have to navigate to the new port in the URL.
¶ Hardening
Lawrence does a great job of going over some basic security hardening tasks. Watch his video for some tips.
https://www.youtube.com/watch?v=fEWobaEIAHM